
(More extensive photos coming soon.)
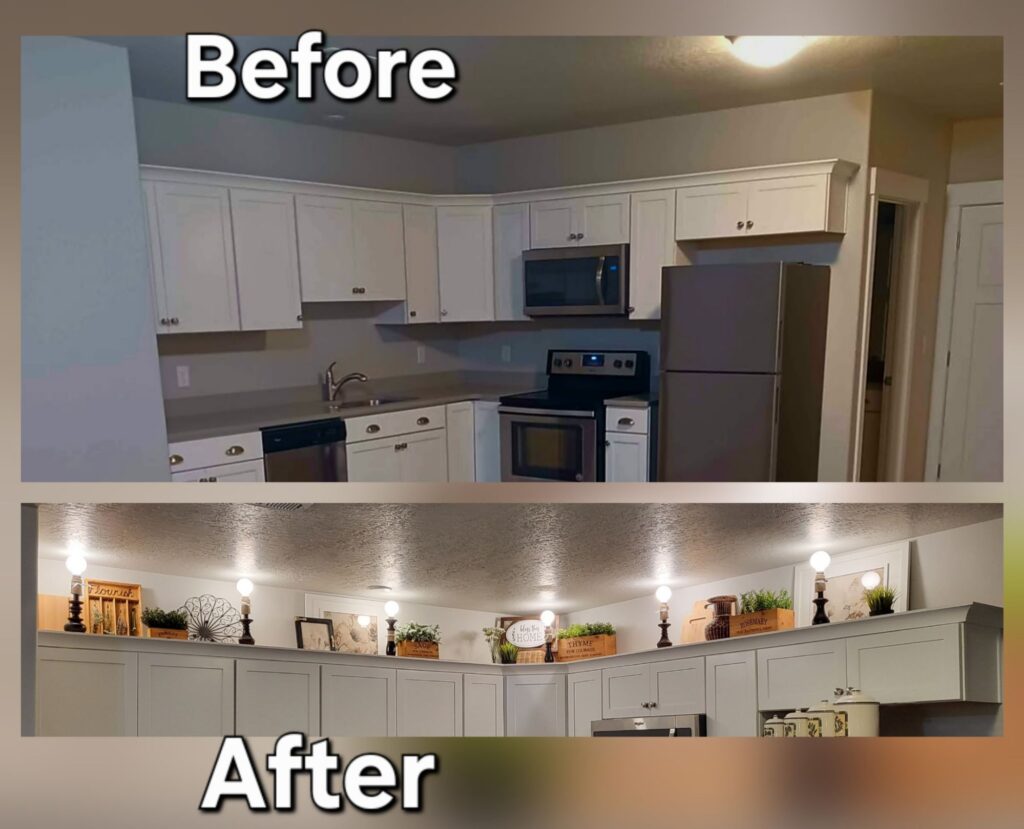
My client just moved into a basement apartment. Quite a nice place, but the kitchen was windowless AND poorly lit (only 2 undersized ceiling fixtures for a large eat-in kitchen.) As a renter, she had limited options for addressing this problem.
Install more hard-wired light fixtures? Nope.
Install a window or skylight? Impossible.
Hire Katrina David for her amazing problem-solving skills and impeccable design sense? Without hesitation!
My client definitely made the right choice, so I set my gears to turning.
First, I Measured
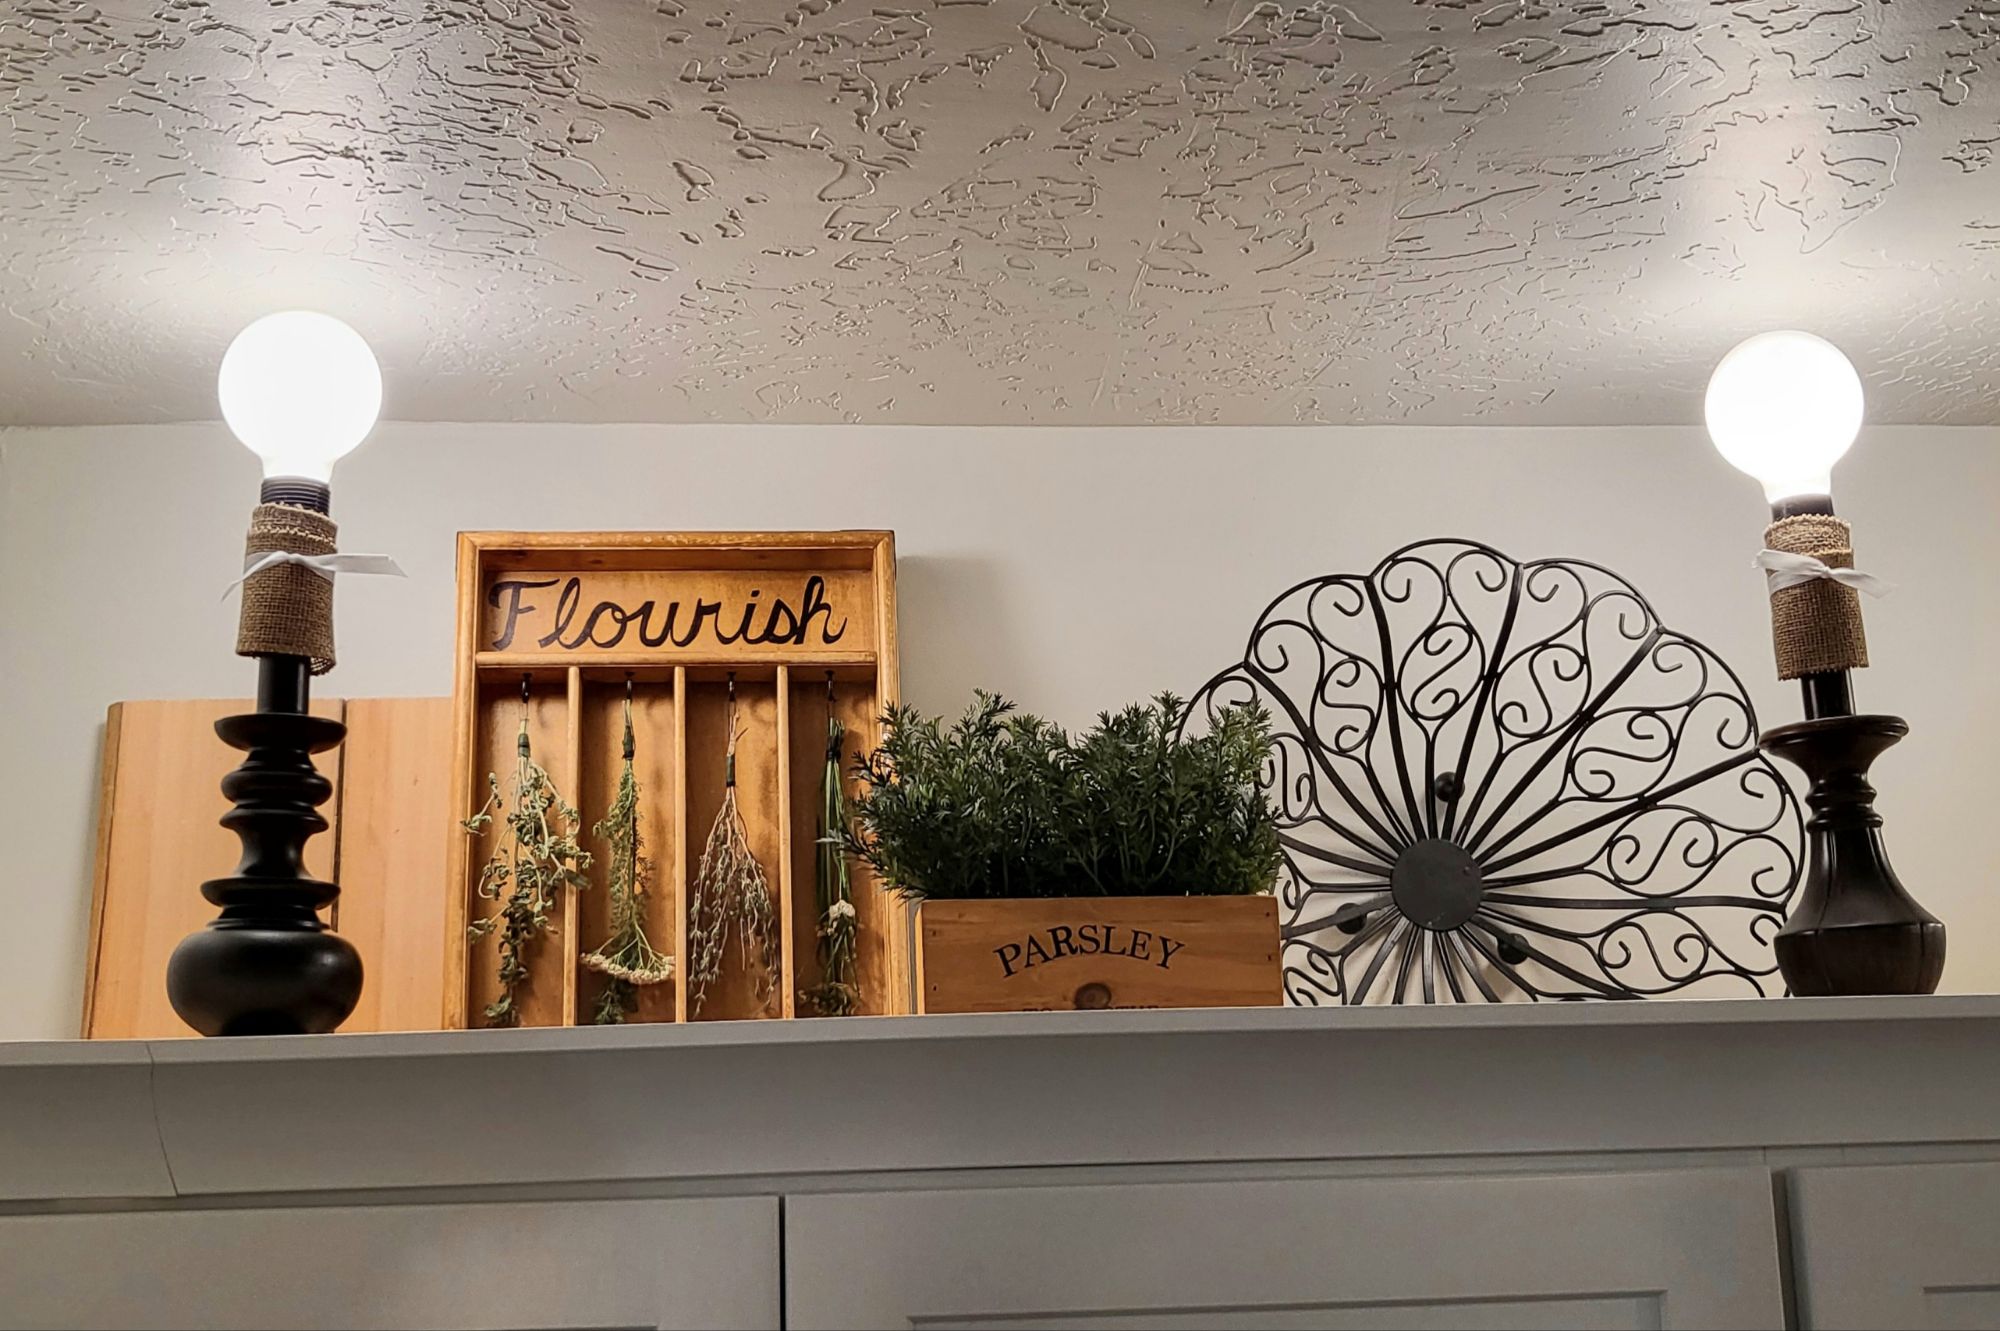
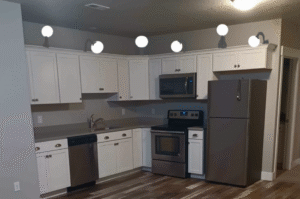
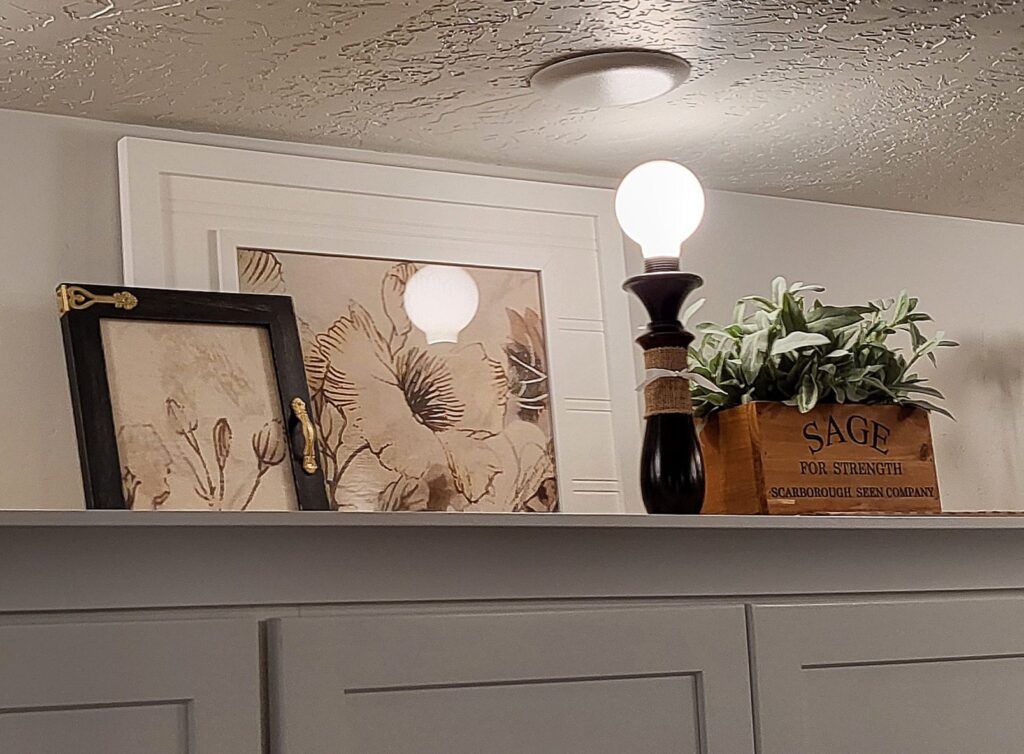
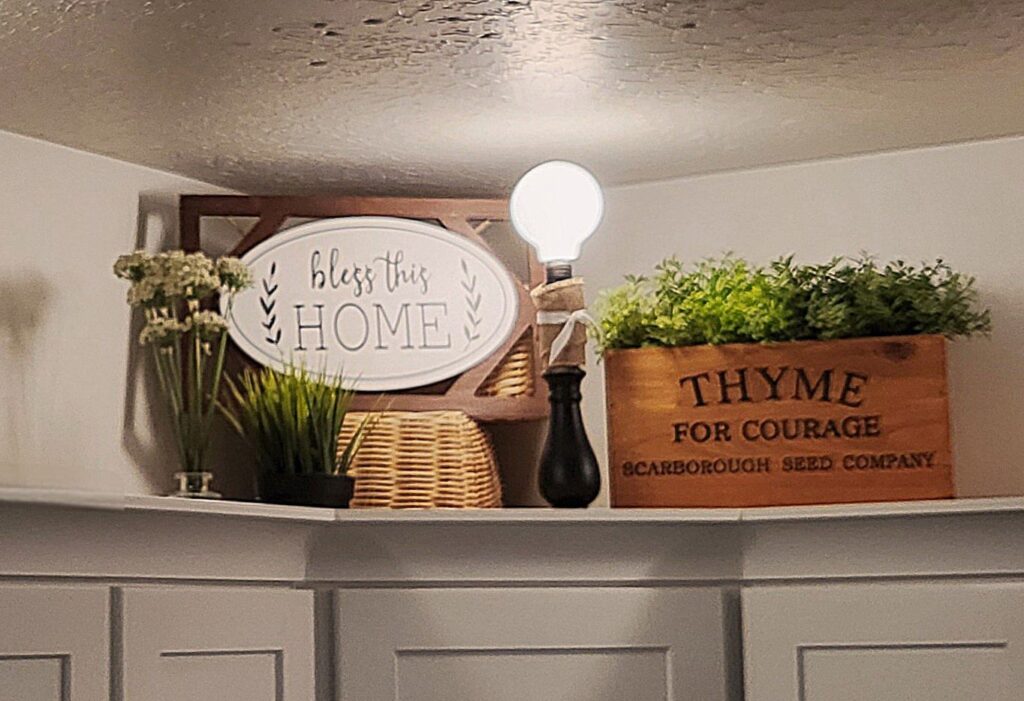
All the upper cabinets had 18.5 inches between them and the ceiling: excellent for several short lamps.
Then, I found the corner cabinet had a triangular void behind it. Running an extension cord from a counter-top outlet through the void to the over-cabinet space provided easy power for the lamps. Thanks to this outlet remote, one touch let there be light!
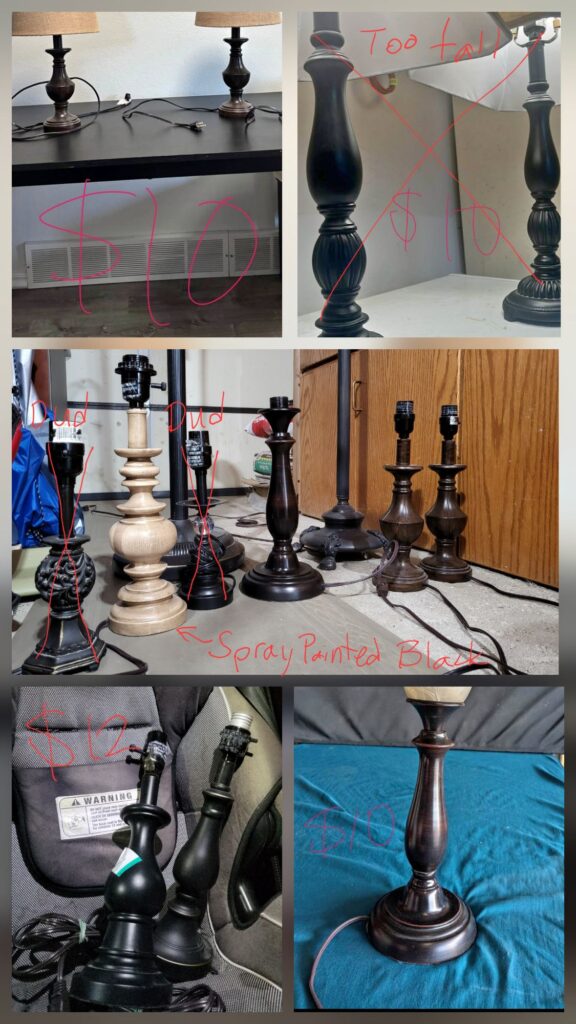
Mock-up approved, I went to work seeking second-hand lamps that fit her style, while remaining short enough to fit in the 18.5″ space.
Give the Lamps a Finished and Unified Look
My plan necessitated leaving off lamp shades (no space for them), while finding other ways to make the lamps feel finished and unified. I started with buying round, frosted bulbs for them.
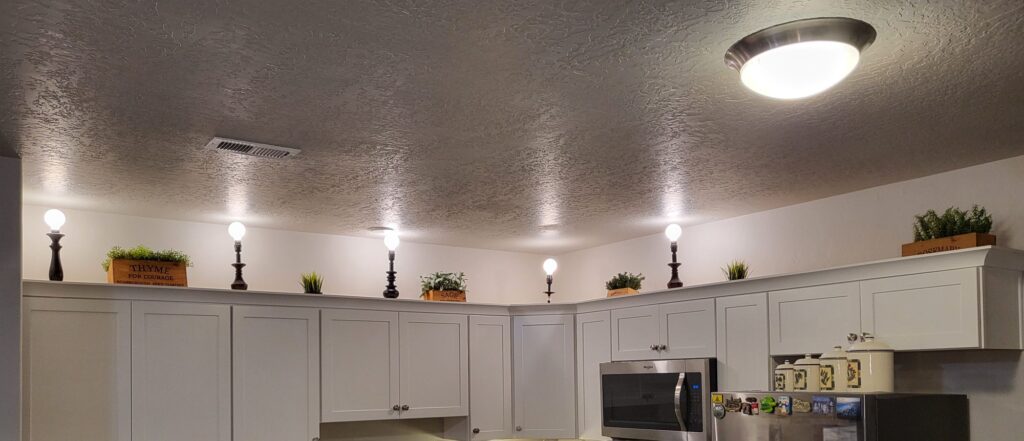
See those adorable herb boxes between the lamps? My client had already collected them as part of her kitchen decor, giving me a rough sense of other pieces needed to make the space look balanced and complete. Now, off to the thrift store! (Possibly my favorite part).
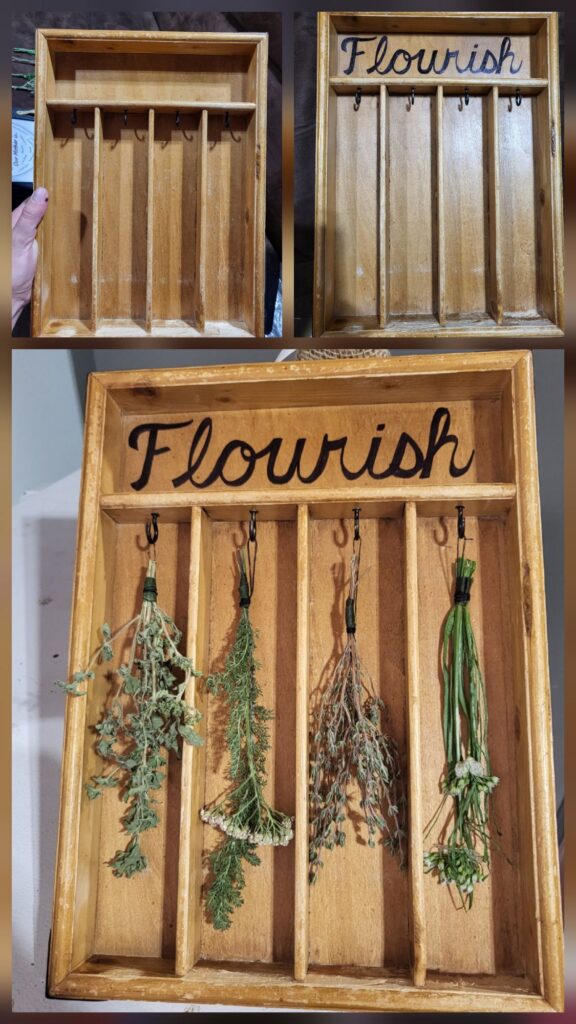
My client instantly loved this “Flourish” piece.
Repurposed . . . Pillow Case?
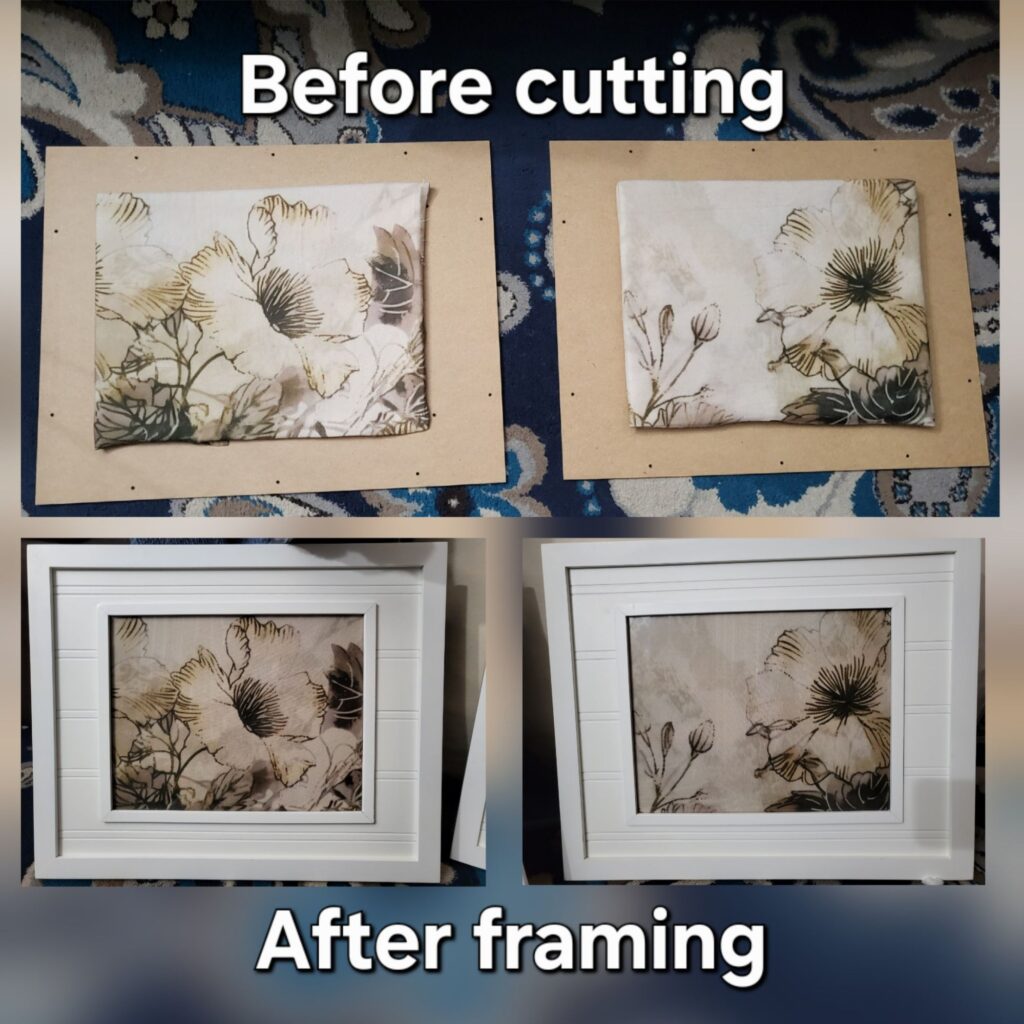
Other pieces needing work included 2 adorable, but empty, white frames. I decided to forgo the delightful, yet time-consuming option of creating 2 paintings or drawings. With some help from my bestie, I found the perfect throw-pillow case, detaching the identical front and back fabric pieces. I selected portions to create the best design as artworks, cut and secured each to backing, and installed in the frames.
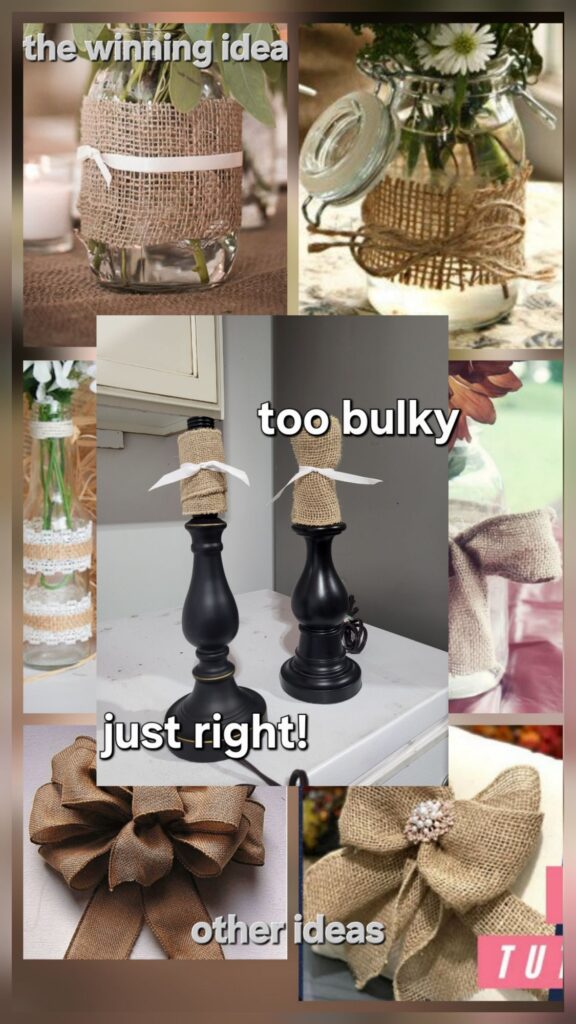
My client liked the idea of adding burlap to the lamps as a further finishing/unifing element, so after some research and adjustments, we landed on the just right combination of curvy black lamp, rough burlap wrap, and smooth white ribbon tie.
There were so many other fun pieces from the thrift store that didn’t need adjusting. Here’s a few close ups of the finished arrangement:

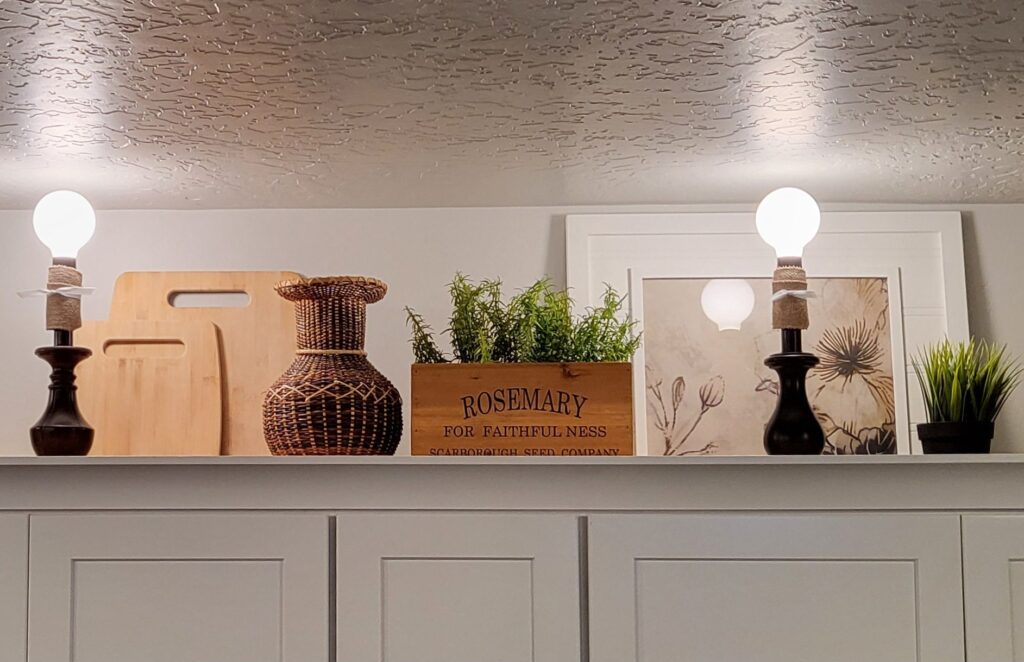
There you have it: four groupings of dazzling decor! Each of the end groups includes 2 lamps to better anchor the design. Every grouping has the perfect balance of light and dark pieces; warm woods and sweet greenery; straight lines and organic curves.
Coming soon: Photos of the under-cabinet lighting, and the 2 floor lamps in their once-dark corners.
Do you have a dreary den? A baffling bathroom? A cluttered corner that you know could serve a better function? You’ve saved up to renovate your kitchen, but you don’t know where to start?
Hire me.
As your interior designer/ renovation designer, and DIY coach; we can demolish every design dilemma together!
I love this, especially the the reuse. Great job.
Thank you! Thrifting is in my soul! I love giving things good a new home and a new use.